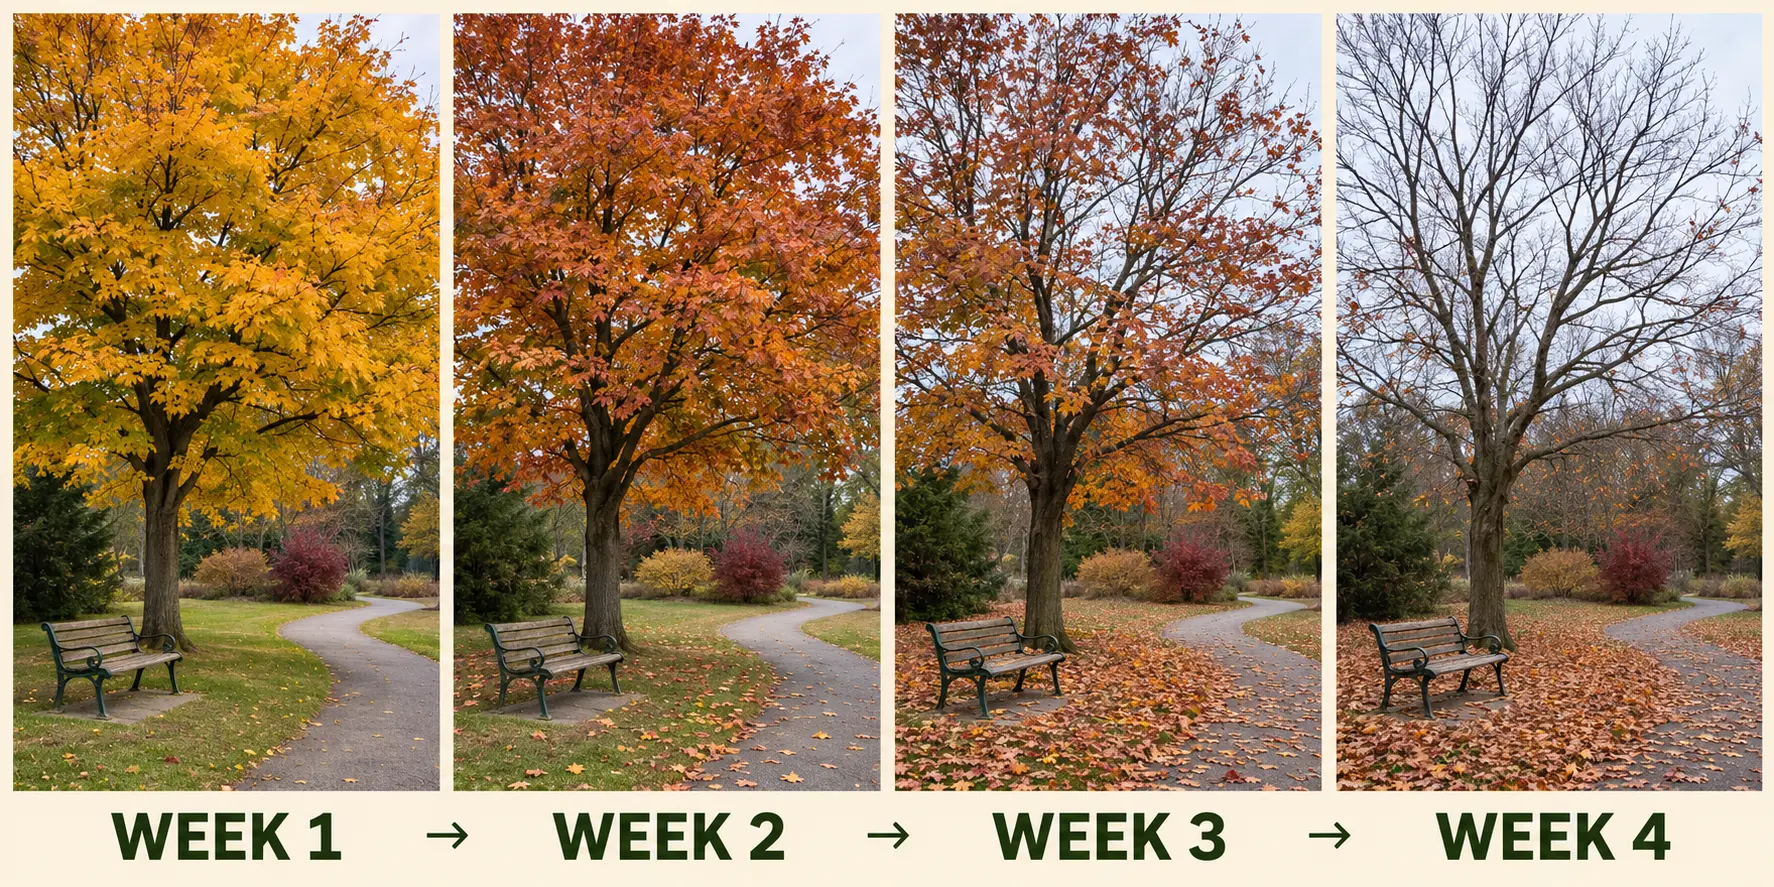
Pick One Tree and Watch It for a Month
Pick one tree you already pass on an ordinary day. It might be the one beside the library parking lot, the maple across from your apartment, or the tree that shades a bench on your usual walk. For the next month, stop at that tree once a week. Take one photo, spend a minute looking, and write down one detail.
On your first visit, you might notice a bright patch of leaves halfway up the canopy. The next week, you might see the same branch more clearly and realize it forks three ways. The fun is having an earlier photo to check when you wonder, Was that there last time?
Choose a tree you’ll actually revisit
A tree on your regular route is a good choice. Pick one you can see from a sidewalk, park path, or your own yard, and find a spot where you can pause comfortably. A bench, a bend in the path, or a seam in the sidewalk makes a good marker for taking the same photo each week.
For the first photo, fit the trunk and as much of the canopy as you can into the frame. Include a little of the ground so you can also compare what gathers beneath the tree. Then pick one smaller detail to follow, like a low branch or a cluster of leaves you can easily find again.
Make it easy to remember. Attach the visit to something you already do. Try “After I drop off my library books on Saturday, I’ll stop by the tree.”
Four weeks, four things to look for
| Visit | Look at | Write down |
|---|---|---|
| Week 1 | The whole tree, from the ground to the highest branches | One feature that will help you recognize it again |
| Week 2 | The same branch you picked on your first visit | One detail that changed or stayed the same |
| Week 3 | The space beneath and around the tree | One thing you see on the ground or notice about the light |
| Week 4 | Your first and last photos side by side | One difference you can point to in the pictures |
Week 1 — Take a photo you can repeat
Stand at your marker and take the wide shot. Before you leave, look for something you could describe without naming the tree. Maybe its trunk leans toward the street, or one low branch reaches straight out over the path. That detail gives you a place to start when you come back.
Week 2 — Follow one branch
Find the branch you chose last week. Look at the tips, then work your way back toward the trunk. Are the leaves bunched at the end? Can you see tiny buds, or a twig you couldn’t see through the leaves before?
Try a note specific enough to check later. “Three yellow leaves are still on the low branch facing the path” gives you more to compare than “Looks like fall.”
Week 3 — Look down
Check the ground around the trunk. Leaves may have collected along the edge of the path, or the tree’s shadow might reach a different spot than you remember. Jot down whether it’s sunny, overcast, or wet. A note about the weather helps when the bark looks darker in one photo and you want to know whether it had just rained.
Week 4 — Compare the first and last photos
Put the pictures side by side and look at the same part of each frame. Start with the branch you followed, then compare the canopy and the ground. Write one sentence that starts with “On the first visit…” and ends with “By the last visit…”
If the tree looks much the same, compare one smaller feature. A month with an evergreen or a bare winter tree may yield a note about cones, branch shape, or a patch of bark you can now recognize from across the street.
Copy this field note
Date and time:
Weather:
Photo taken from:
One detail I noticed:
One thing to check next time:
A missed week is easy to work around. Go back when you can, take the photo from your usual spot, and date it. At the end of the month, keep the first and last pictures together. The next time you pass that tree in a different season, you’ll have something to compare it with.